GebraBit

GebraBit Resistive Soil Moisture Module Overview

متن سربرگ خود را وارد کنید

resistive soil both3

GebraBit Resistive Soil Moisture Module Overview

  1. Home
  2. »
  3. Blog
  4. »
  5. GebraBit Resistive Soil Moisture Module Overview

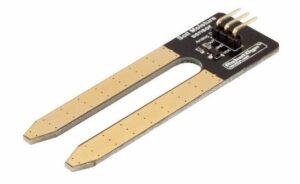
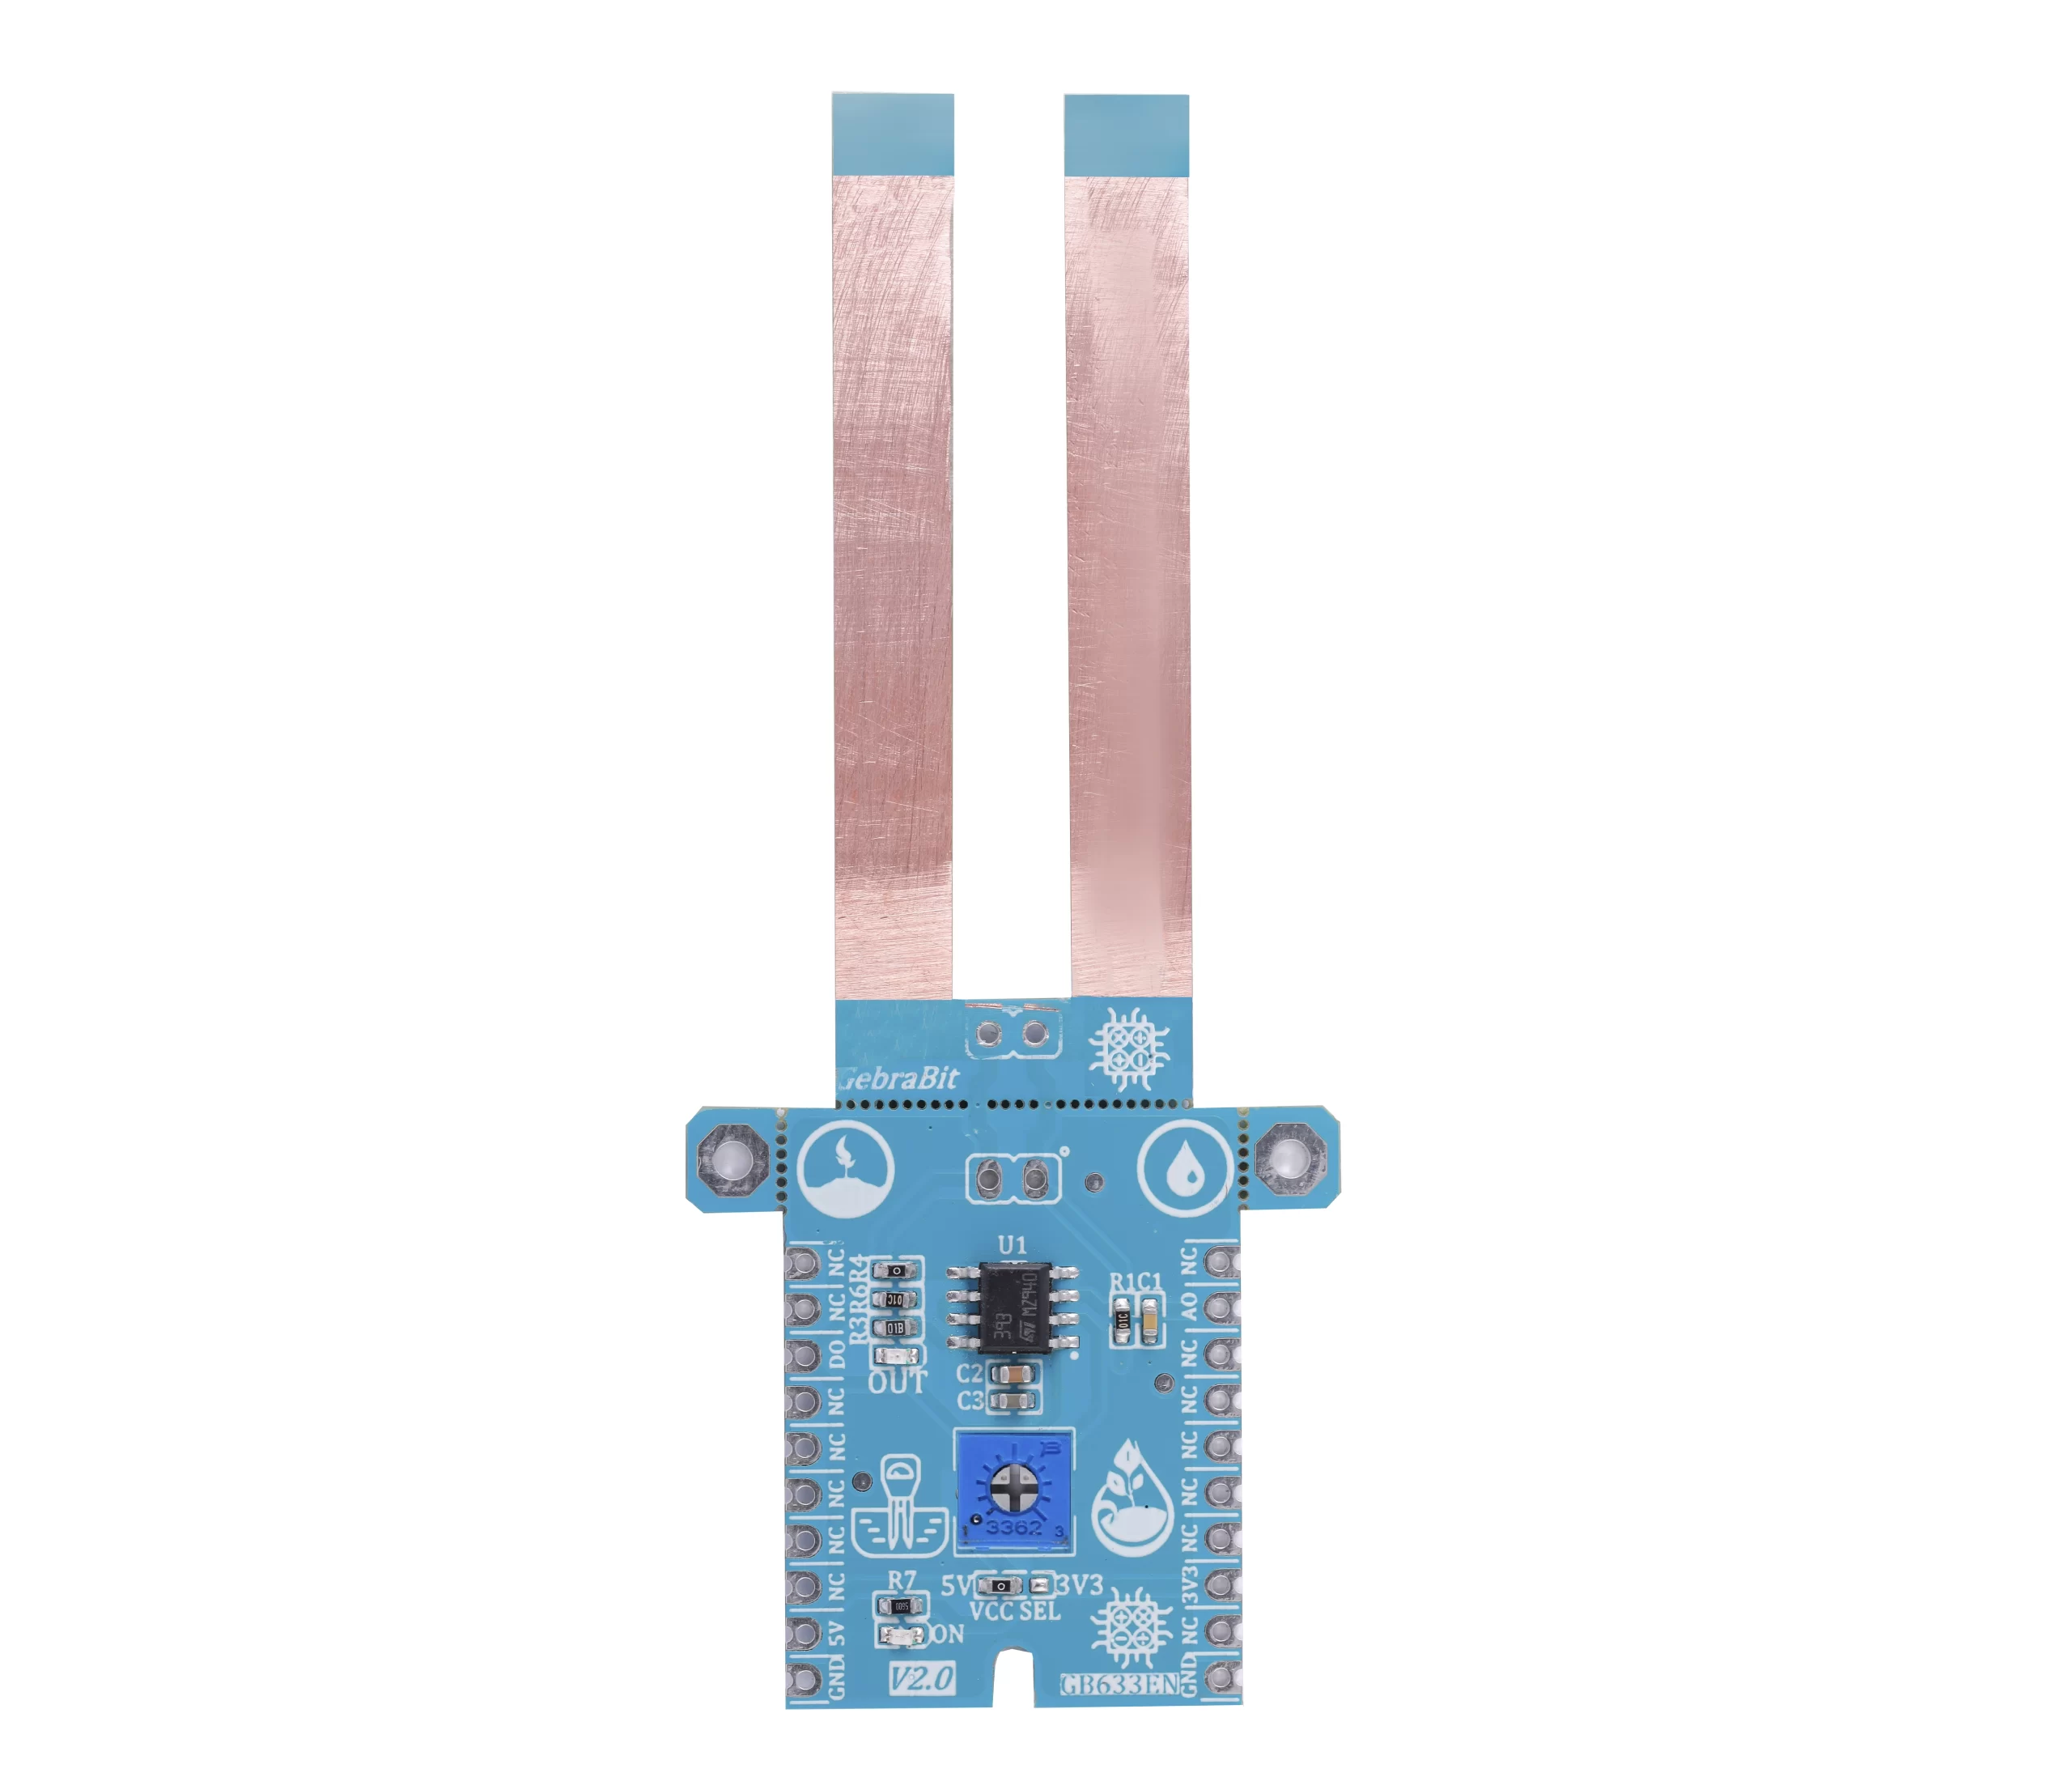
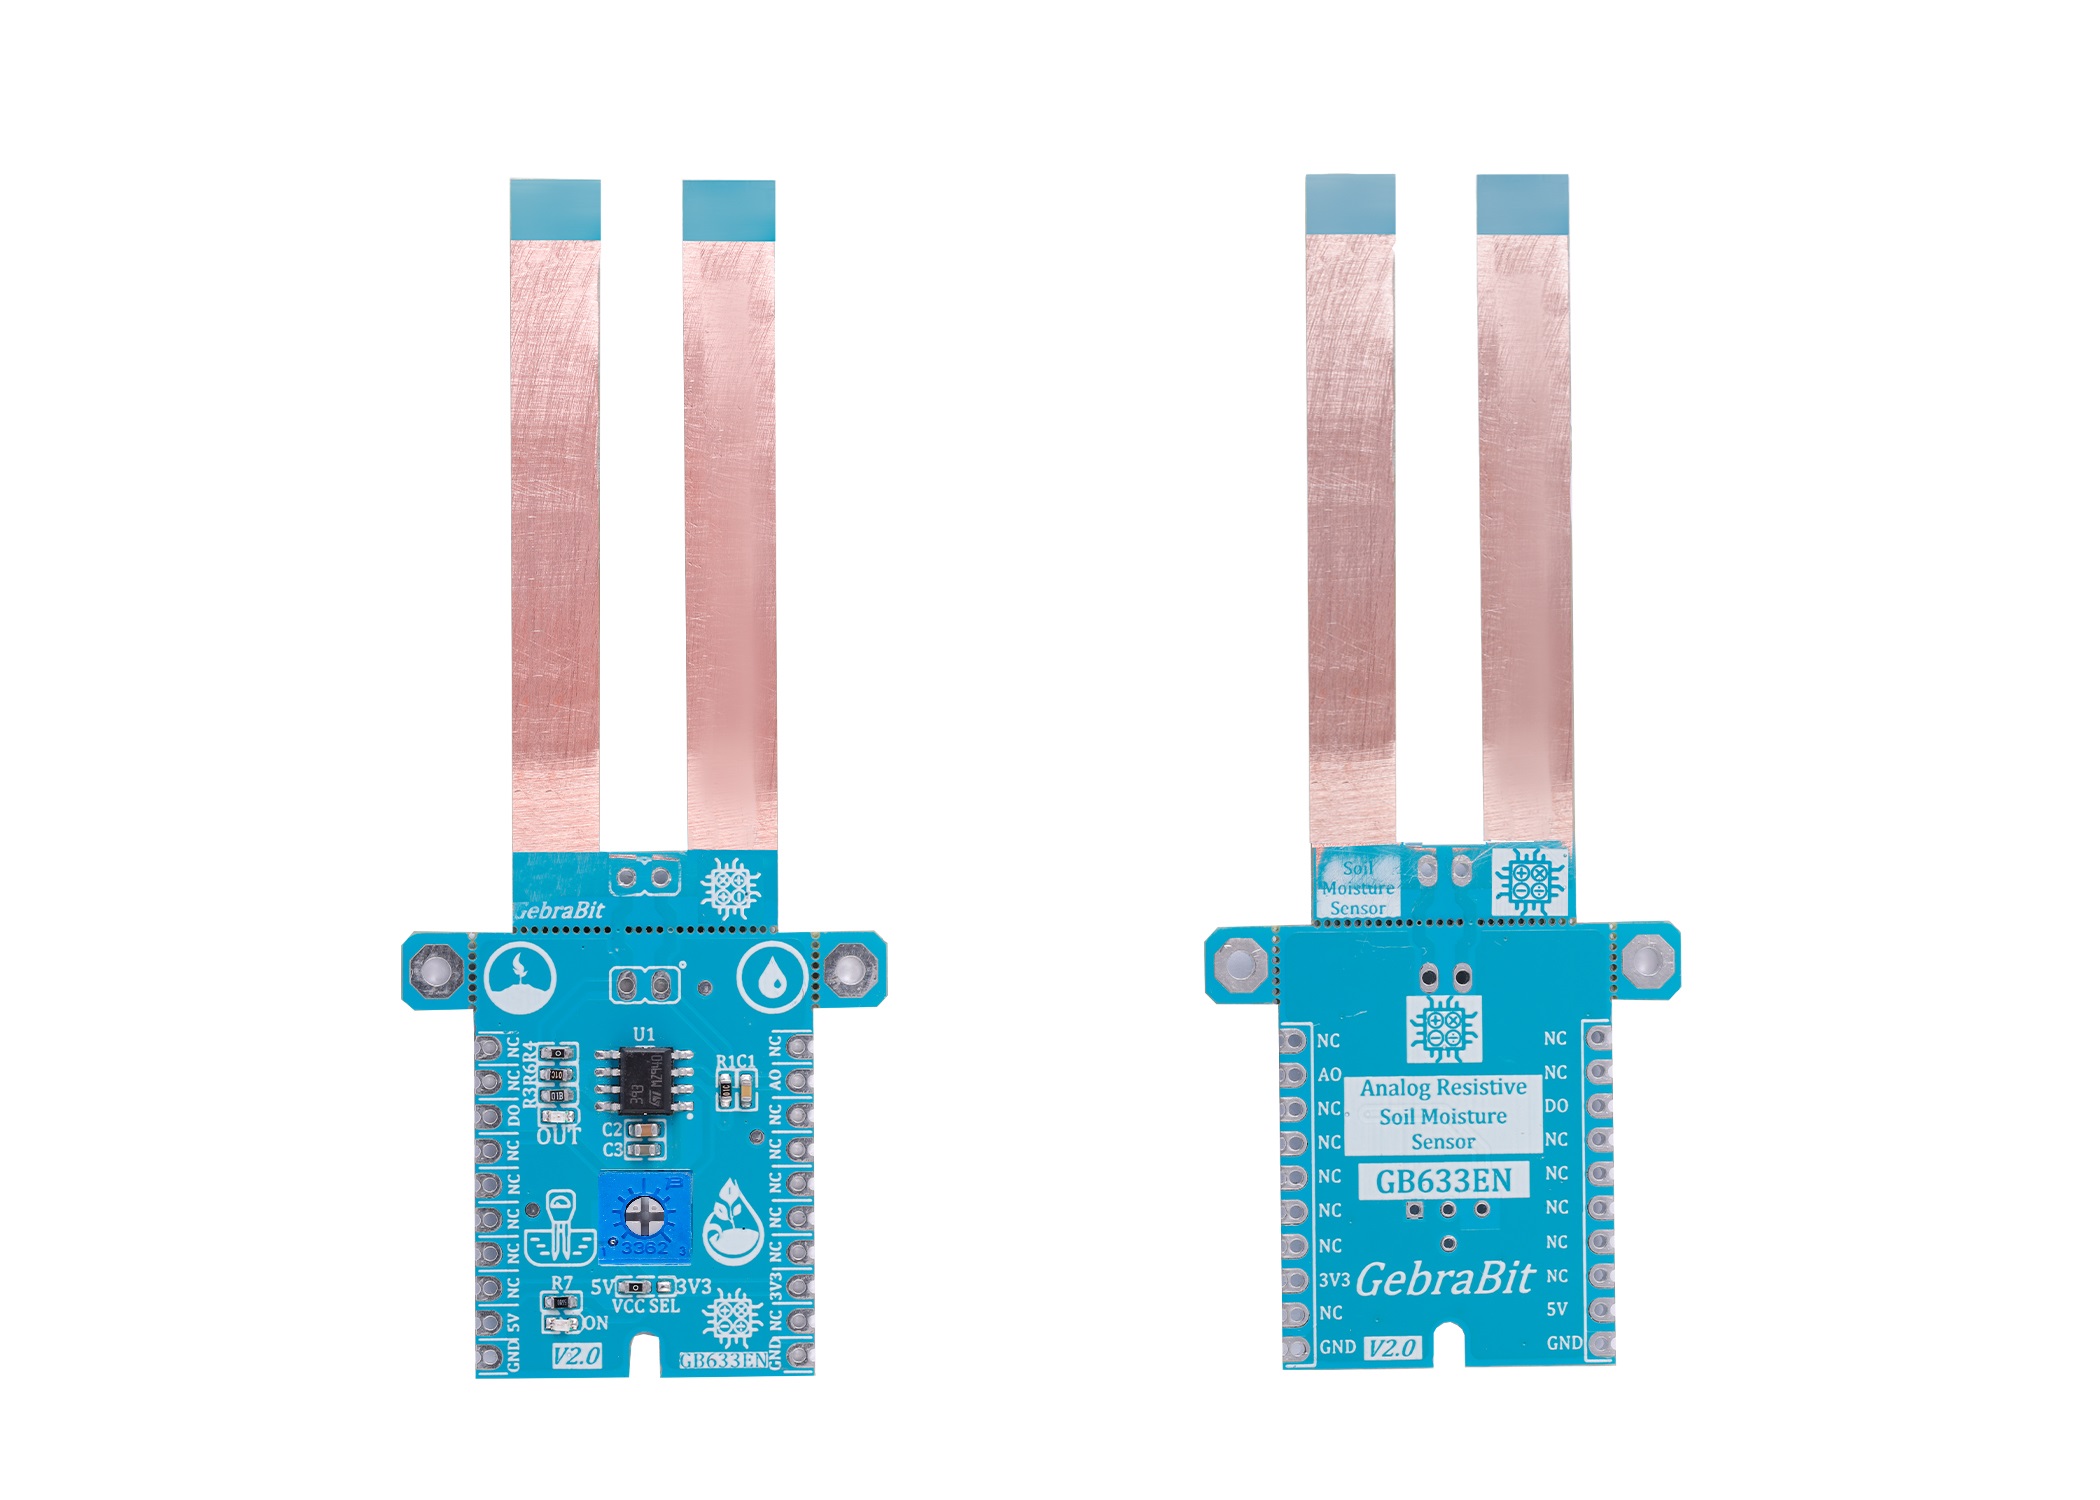
A resistive soil moisture sensor works by using the relationship between electrical resistance and water content to gauge the moisture levels of the soil. You’ll observe these sensors to possess two exposed probes that are inserted directly into the soil sample. A electrical current is sent from one probe to the other, which allows the sensor to measure the resistance of the soil between them.

When the water content in the soil is high, it has a higher electrical conductivity (water is a good conductor of electricity!). Hence, a lower resistance reading is obtained which indicates high soil moisture.

When the water content in the soil is low, it has poorer electrical conductivity. Hence, a higher resistance reading is obtained, which indicates low soil moisture.

GebraBit Resistive Soil Moisture sensor module

GEBRABIT Resistive Soil Moisture module determines the amount of soil moisture by measuring changes in electrical resistance to determine the water content of the soil. This module uses electrical resistance to determine soil’s water content and has an Analog output of moisture content and a digital output of the comparator on the module.

GEBRABIT Resistive Soil Moisture has an analog and Digital output capable of using 3V3 and 5V Supply Voltages that users can easily select with Considered on board jumper select. This feature helps to use a wide range of microcontrollers for interfacing with this module.

It is worth noting that the GebraBit Resistive Soil Moisture module is designed in such a way that users can separate the control part and the resistive part of the module if needed, and communicate between these two parts by using two Right Angel header pins and a wire.

To access the output data, it is enough to put the GebraBit Resistive Soil Moisture module in the BreadBoard, then by applying the proper voltage set up the GebraBit Resistive Soil Moisture module with any of Arduino, Raspberry Pi, Discovery board, and especially we recommend using GebraBit microcontroller development modules (GebraBit STM32F303 or GebraBit ATMEGA32 module) then receive the data.      

The reason for our recommendation when setting up the GebraBit Resistive Soil Moisture module with GebraBit microcontroller development modules (such as GebraBit STM32F303 or GebraBit ATMEGA32), is the presence of a 3V3 regulator and the compatibility of the pin order of all GebraBit modules together (GEBRABUS standard), it’s enough to Put the GebraBit Resistive Soil Moisture module in the corresponding socket as shown in the above picture and develop the desired sensor module without the need for wiring.     

GebraBit Resistive Soil Moisture sensor module Key Features

  • Selectable module power supply voltage between3V3 and 5V
  • On Board, ON/OFF LED indicator
  • Board LED indicator for sensor interrupt
  • GEBRABIT Pin Compatible with GEBRABUS
  • It can be used as a daughter board of GEBRABIT MCU Modules
  • Featuring Castellated pad (Assembled as SMD Part)
  • Separatable screw parts to reduce the size of the board
  • Package: 36.29mm x 107.72mm

Introduction of module sections

Resistive probes

The sensor consists of two probes which are used to measure the volumetric content of water. The two probes allow the current to pass through the soil and then it gets the resistance value to measure the moisture value. When there is more water, the soil will conduct more electricity which means that there will be less resistance. Therefore, the moisture level will be higher. Dry soil conducts electricity poorly, so when there will be less water, then the soil will conduct less electricity which means that there will be more resistance. Therefore, the moisture level will be lower.

LM393 convertor

In the GebraBit Resistive Soil Moisture module, an LM393 op-amp is used to convert the input analog signal from the sensor probe into a digital signal.

Sensitivity potentiometer

In the GebraBit Resistive Soil Moisture sensor, a potentiometer is used to determine the sensitivity threshold of the sensor.

Out LED

When the soil moisture level goes above, or below the threshold, the “OUT” LED status will be changed.

VCC SEL jumper

According to the state of 0R resistance of this jumper, the main voltage of sensor power supply is selected between “5V” and “3V3”.

Power LED

According to the state of the VCC SEL jumper and by applying voltage to the module through the corresponding pin, this LED will be lit.

GebraBit Resistive Soil Moisture Module pins

Supply pins

  • 5V and 3V3: These pins can supply the sensor main power according to the state of the VCC SEL selector jumper.
  • GND: This is the ground pin for powering the sensor.

Output pins

  • AO: This pin is the analog output pin of the module, which is used to receive the soil moisture value as an analog output.
  • DO: The comparator digital output is available through this pin. As soil moisture changes, the logic output (0 and 1) also changes.

Connect to the processor

Connection with GebraBit STM32F303

Due to the compatibility of the pin order of GebraBit modules with each other (GEBRABUS standard), to start the GebraBit Resistive Soil Moisture module with GebraBit STM32F303 microcontroller module, it is enough to easily place the GebraBit Resistive Soil Moisture module as pin to pin on the GebraBit STM32F303 module and start the module by applying voltage. Here, for better understanding, the separate connection of these two modules is shown:

Connection with GebraBit ATMEGA32A

Due to the compatibility of the pin order of GebraBit modules with each other (GEBRABUS standard), to start the GebraBit Resistive Soil Moisture module with the GebraBit ATMEGA32A microcontroller module, it is enough to easily place the GebraBit Resistive Soil Moisture module as pin to pin on the GebraBit ATMEGA32A module and start the module by applying voltage. Here, for better understanding, the separate connection of these two modules is shown:

Note: If you use GebraBit microcontroller modules, make sure that the VCC SEL selector jumper of GebraBit Resistive Soil Moisture module is set to “3V3” so that you can easily get “3V3” voltage from the microcontroller module.

Connection with ARDUINO UNO

Follow the steps below to connect the GebraBit Resistive Soil Moisture module to ARDUINO UNO:

  • Connect the “5V” pin of the Resistive Soil Moisture module to the “5V” pin of the ARDUINO UNO board output (red wire).
  • Connect the “GND” pin of the Resistive Soil Moisture module to the “GND” pin of the ARDUINO UNO board. (Black wire)
  • Connect the “DO” pin of the Resistive Soil Moisture module to one of the ARDUINO UNO board digital pins (Blue wire).
  • Connect the “AO” pin of the Resistive Soil Moisture module to one of the ARDUINO UNO board analog pins (orange wire).

How to connect the above mentioned steps can be seen in this picture:

این مقاله را با دوستانتان به اشتراک بگذارید!

Leave a Reply

Your email address will not be published. Required fields are marked *

Shopping cart
Start typing to see posts you are looking for.

Sign in

No account yet?