Condenser Microphone
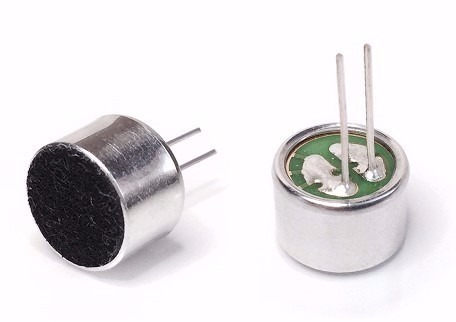
The microphone is a transducer device which converts sound energy into electrical energy. Microphones are often referred to a MIC. A microphone is used to capture some sort of sound and produce an electrical signal according to it.
A microphone has a sensitive component which converts the air pressure variations created by the sound wave into electrical signal. Depending on this component and the method to convert the sound wave into Electrical signal, there are various type microphones are available in the electronics and sound engineering field. Most common types are Dynamic Microphones, Condenser Microphone, Piezo electrical microphone etc.
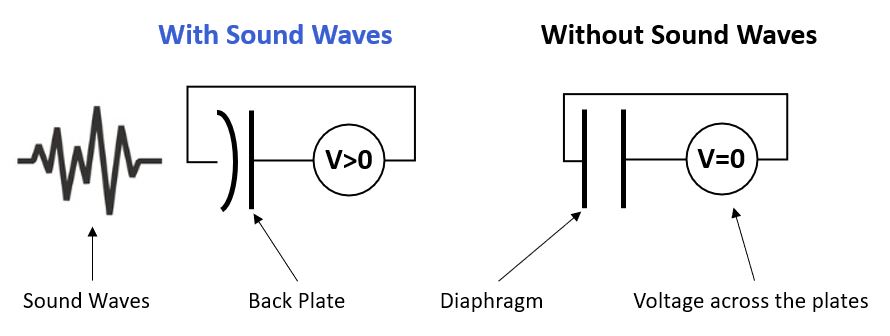
The microphone generates the input for the sound sensor module and consists of a thin diaphragm that is one plate of a capacitor. The second plate of the capacitor is the back plate and in parallel to the diaphragm in very close distance. The following picture shows a basic schematic of the microphone.

If someone speaks into the microphone, the sound waves created by the voice hit the diaphragm. Due to those hits, the diaphragm vibrates and therefore the distance between the two plates of the capacitor gets shorter or wider (picture on the left side).
Because the capacitance is directly proportional to the distance between the plates, the sound waves of the voice changes the voltage across the plates that has a direct influence of the circuit of the sensor module.

sound detector module
The sound sensor is a module that monitors and detects the sound signals like voice, claps, snaps, knocks, etc. It is also known as an acoustic sensor or sound detector. Used in various applications such as security systems, monitoring systems, radios, telephones, mobile phones, computers, home automation systems, consumer electronic appliances, etc.
Sound detection sensor works similarly to our Ears, having diaphragm which converts vibration into signals. However, what’s different as that a sound sensor consists of an in-built capacitive microphone, peak detector and an amplifier (LM386, LM393, etc.) that’s highly sensitive to sound.
It contains a microphone, power amplifier, and output actuator. The microphone that acts as an input sensor receives the sound signal and converts it into an electrical signal. Then this signal is amplified by the power amplifier and its amplitude is detected by the peak detector. The output actuator, like a loudspeaker, converts this amplified electrical signal into a sound signal for listening.
GebraBit sound detector module Key Features

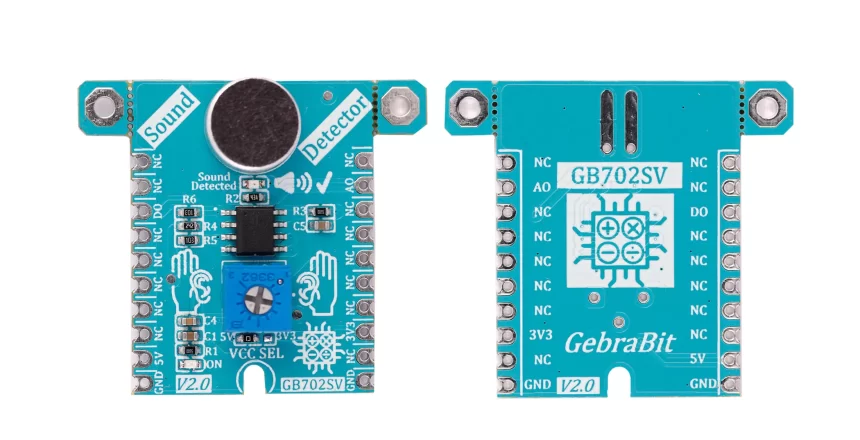
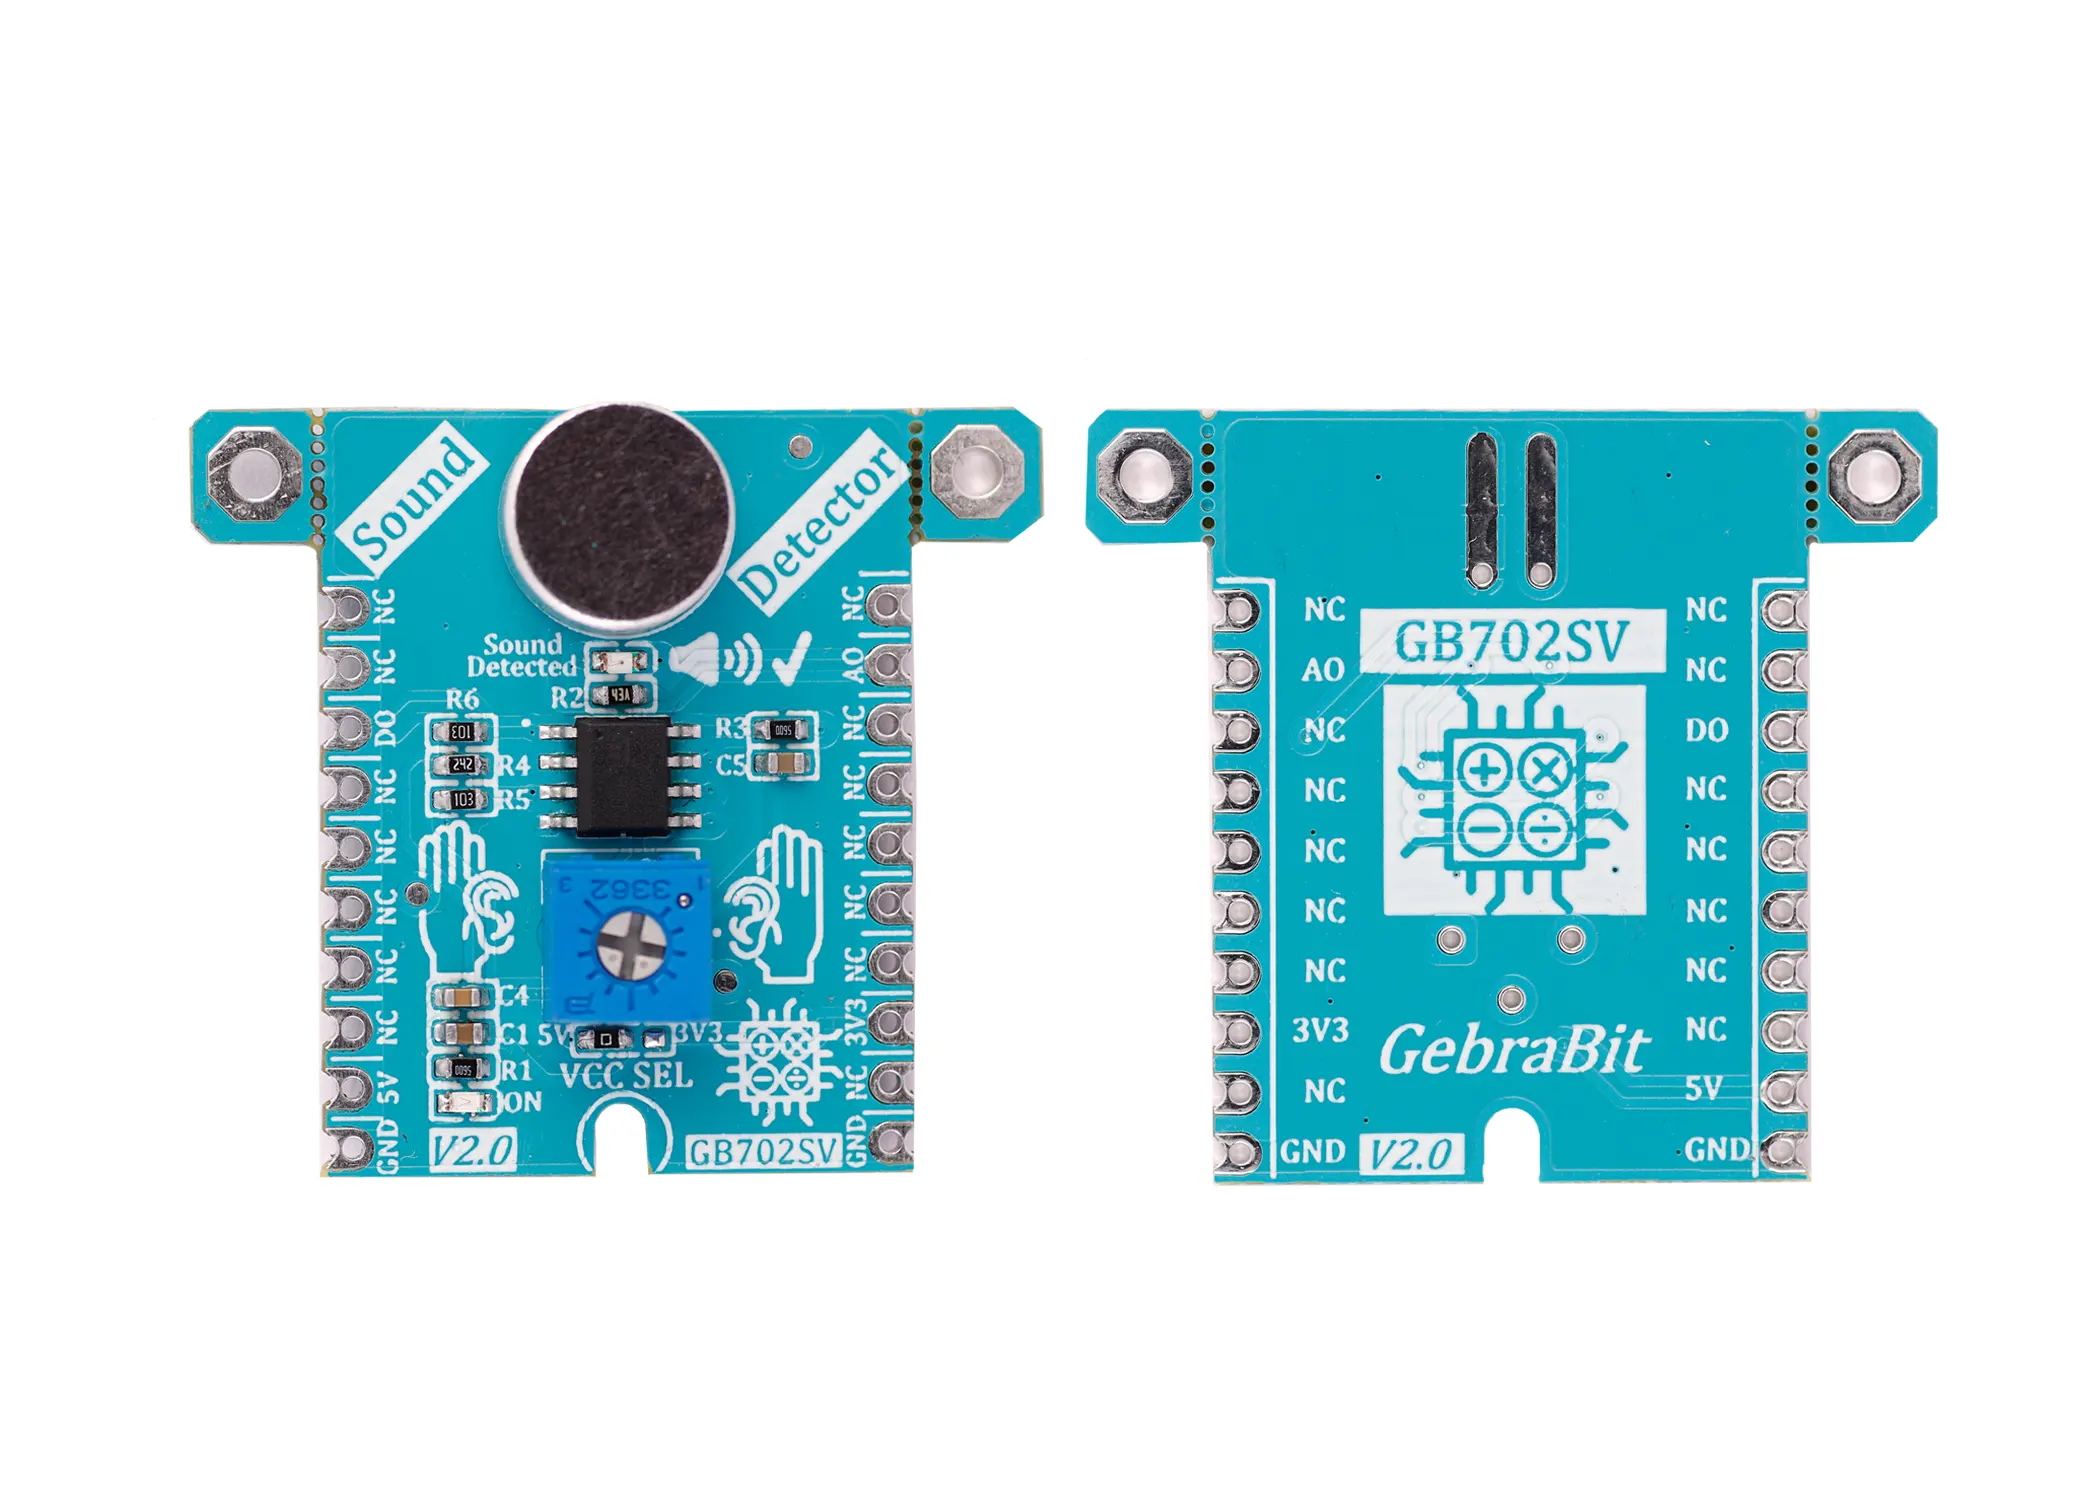
GebraBit Sound Detector module is a Highly-Sensitive microphone integrated with a LM393Voltage Comparator OpAmp. This module has a potentiometer to adjust the sound intensity threshold and works with two working voltages of “5V” and “3V3” by considered “VCC SEL” jumper selector. Also, through GebraBit Sound Detector, users can access to analog and digital outputs of the sensor.

To start this module, just put the GebraBit Sound Detector module in the BreadBoard, then you can start the module with any of Arduino, Raspberry Pi, Discovery board, now by applying the proper voltage you can start the sound detector module and receive the data. we recommend using GebraBit microcontroller development modules.

The reason for our recommendation when setting up the GebraBit Sound Detector module with GebraBit microcontroller development modules (such as GebraBit STM32F303 or GebraBit ATMEGA32), is the presence of an internal 3V3 regulator on these modules and the compatibility of the pin order of all GebraBit modules together (GEBRABUS standard), it’s enough to Put the Sound Detector module in the corresponding socket as shown in the above picture and use the Sound Detector module easily.
Introduction of module sections

LM393 comparator
This comparator is the main IC of the module, which receives the output of the microphone and the voltage which was set by the potentiometer and by comparing these two values, when the sound intensity goes above or below the set threshold, provides output changes to the user through output pins.

microphone
The microphone used in this module is a condenser microphone. One of the bases of this microphone is connected to “GND” and the other to the “IN1” pin of the “LM393” comparator, so the analog output of the microphone enters the comparator as one of the inputs of the comparator.

the sound intensity threshold Potentiometer
In order to change or adjust the sound intensity threshold and the module sound sensitivity, a potentiometer is installed on the module. The output voltage of this potentiometer enters the LM393 comparator as an input.

“sound detected” LED
When the sound intensity goes above, or below the threshold, the “Sound Detected” LED status will be changed.

VCC SEL selector jumper
As it was said, GebraBit Sound Detector module can work with “3V3” and “5V” voltage .it can be selected through the “VCC SEL” selector jumper, according to the 0R resistance state of this jumper, the sensor main supply voltage can be selected between “3V3” and “5V”.

power LED
According to the state of the “VCC SEL” jumper and by applying voltage to the module through the corresponding pin, the LED of the module will be lit.

GebraBit sound detector Module pins

Supply pins
- 3V3 and 5V: It was said earlier that the GebraBit Sound Detector module has two working voltages, “3V3” and “5V”, which can be selected through the “VCC SEL” selector jumper. According to the 0R resistance state of this selector jumper, the corresponding pin to the selected voltage, will be responsible for providing the main power supply of this module.
- GND: This is the ground pin of the module.

out pin
- AO: Sound Detector module analog output is available on the “AO” pin. the output of this pin changes with the change of sound intensity and impact.
- DO: This pin is used to receive the digital output signal of the module. when the sound intensity goes above, or below the threshold, the logic output(0 and1)and as a result ,the “DO” pin output will be changed.

Connect to the processor

connect to GebraBit STM32F303 and ATMEGA32A
To connect the GebraBit Sound Detector module to the GebraBit STM32F303 or GebraBit ATMEGA32A microcontroller modules, due to the compatibility of the GebraBit Sound Detector module pins with the GebraBit STM32F303 and GebraBit ATMEGA32A pins and the existence of a “3V3” regulator on these modules, it is enough to put Sound Detector module on the microcontroller as pin to pin and start the module by applying voltage.

Connection with GebraBit ATMEGA32A microcontroller is the same.
Note: If you use GebraBit microcontroller modules, note that the “VCC” selector jumper of the GebraBit Sound Detector module is set to “3V3” so that you can easily use the Sound Detector module by taking “3V3” voltage from the microcontroller module.
connect to ARDUINO UNO
Follow the steps below to connect GebraBit Sound Detector module to ARDUINO UNO:
- Since the “VCC” selector jumper is set on “5V”, Connect the “5V” pin of the Sound Detector module to the “5V” output pin of the ARDUINO UNO board. (red wire)
- Connect the “GND” pin of the Sound Detector module to the “GND” pin of the ARDUINO UNO board (black wire).
- Connect the analog pin “AO” of the Sound Detector module to one of the analog pins of the ARDUINO UNO board(e.g.”A0”). (green wire)
- Connect the “DO” pin of the Sound Detector module to one of the ARDUINO UNO pins. (yellow wire)
You can see how to connect the above mentioned steps, in the below picture:


